In the previous post, I setup a a custom "crufty_midi" theme for me to use in Reaper.
Theming in Reaper is fairly straightforward; I'll edit a text file "crufty_midi.ReaperTheme" first and connect to our custom images folder--just in case. Then i'll edit an "rtconfig.txt" file and add a custom track layout for myself (We still have the unchanged, default theme present in case I goof up).
I'll select my theme from inside Reaper, and each time I make edits, reselect.
The engine that Reaper uses for theming is called "WALTER". Anytime we see "WALTER" in the context of Reaper, we should think of this "crufty_midi.ReaperTheme" text file, and any associated images/files.
1. Getting started: essential WALTER Links
White Tie "Themer's Guide "Tutorial
A Reaper user has posted an awesome tutorial for WALTER theming...read this first! This http://www.houseofwhitetie.com/reaper/walter_themers_guide.pdf
Official WALTER syntax
The Reaper www site has the official WALTER syntax:
http://www.reaper.fm/sdk/walter/walter.php
Official WALTER Forum
The Reaper forums are very friendly and a great resource:
http://forum.cockos.com/forumdisplay.php?f=26
I won't be covering WALTER 101 stuff--the above links will be way more up to date.
2. Open crufty_midi.ReaperTheme
Very few edits will be made to the .Re
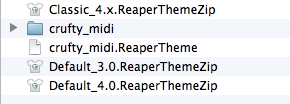
First, we navigate to the ColorThemes folder and double click on crufty_midi.ReaperTheme
If this is the first time we are trying to open a ReaperTheme file, OSX may not know what to do with it. I use the TextEditor because I too lazy to install a "better" editor, though I am sure there are better options.
2. Set ui_img to "crufty_midi"
I find the setting for "ui_img" and ensure it knows about our image subfolder. Not sure if this is strictly necessary:
I save--and quit. This is edit for edits to the crufty_midi.ReaperTheme file!
3. Open up rt_config.txt
Next, I descend into the crufty_midi subfolder and double click on the rt_config.txt file. This will open the "WALTER" syntax file in TextEdit, and allow me to make mods in ernest!
Again--I'm sure there are 'better' text editors...this is just what i use.
A. Add a crufty_midi layout
Inside of rt_config.txt there are a whole host of options, settings, and finite-state-machine flotsam and jetsam. If the rt_config.txt seems alien at first--do not despair! We can compartmentalize our mod almost entirely, so that we gain all the benefit of our default theme, and don't have to learn the WALTER syntax to the n'th degree.
First, we go and find where the walter init ends and the CockOs default theme begins.
Next, we add our little crufty_midi track layout.
I save. As long as I keep all my mods in between the comments 'Crufty Begin' / 'Crufy End' have a very simple way to 'upgrade' my mod with new themes as they come out.
B. Basic Theme Desires
Rather then go into the syntax of the crufty_midi theme--I'll post the actual theme on the Reaper stash (a place for files to be shared with the rest of the reaper community) so folks can download and inspect as they desire.
Instead, I'll talk about what I want from my theme:
First, the default theme is "too bulky".
For Midi oriented tracks, I need only Mute, Solo, FX (for vst controls) and envelopes. I also need VST "FX" parameters, so that I can pick patches directly from the track itself. I don't need any i/o, volume, pan, or 'audio' related misc stuff. These can all be found on the vertical "mixer" layout.
Next, I want the label last, not first. I want the buttons all on the left--and the parameters to the right of the label. I want it all to "shrink" reasonably, with buttons disappearing as we run out of column space.
I guess a list will help--what is important to display, in order?
- Track Number
- Folder compress/uncompress
- Track Name
- Mute & Solo
- FX Window & Envelope Display
- VST "FX" Parameters (esp important for bank/patch selection via ReaControlMidi)
Hmm..thinking about it, I want everything displayed in a single row when the track height is small.
I never really have tall track heights--but I can see where I might want more horizontal space w/out sacrificing buttons. So if my track height is < 32 pixels, all buttons will be on a single row. But, if the track height is >32 pixels, I'll want buttons oriented in a 2x2 grid,w/a taller label.
C. Layout Pseudo Code
In my mind, I determine the layout will be structured:
- Hide & clear all unused elements (io, vol, pan, etc)
- Create positional macros for the buttons (2x2 grid vs single row)
- Place track index
- Use the height & width of the panel to determine the x, y, w, h of the first four buttons (mute, solo, fx, envelope)
- Hide buttons based on panel width
- Use panel height to determine grid or row positioning
- Next we'll plop the label, using panel width to determine x positioning--the label x will have to shift based on the number of buttons visible
- If parameters aren't visible, the label width will have to be longer
- Parameters (if there) will be last, and only if there is room.
- Finally the folder button.
How will I know where to place eveything? I basically have two categories of use cases: short (<32 and="" pixels="" tall="">=32 pixels).
Use Cases
In the short category, I'll have three display cases:
- Completely minimal--label only
- Mute & Solo & Label only, all in a row
- Everything
In the tall category, I'll have three equivalent display cases:
- Completely minimal--label only
- Mute & Solo & Label only, with mute and solo above/below each other
- Everything
Ideally it would be cool to generate the positional information programmatically. However, to do so, we'll need the "-" operator--and walter doesn't know how to subtract. It only knows how to add and multiply. True, a - b = a + 1 * - b, but this is an extra layer of complexity we don't need.
So instead, I'll use Apple's Numbers spreadsheet to determine the x,y,w,h layout.
4. Numbers
The Numbers document I make will be used to copy and paste widget positions into the rtconfig.txt file. I'll use the Numbers document to programmatically determine widget layout, vs trying to do it inside rtconfig.txt via Walter--it's just easier for me this way.
Widget Dimensions
First, I create a table "Gui Sizes" of basic dimensional information:
Short
Next, I create the three uses cases for short -- i want everything in a row. So where will all the widgets go?
Note:
The final "everything" use case table has our panel width--340. to make our life really easy, I have found it important to make sure all our setups fit within this same width.
So our first two use cases have a gap calculation, which we add to the label width--this makes sure all our panel layouts will have the same dimension.
Tall
Do the same thing for the tall uses cases:
Notice how the X/Y of the 2x2 grid is different.
Summary
In the WALTER logic, I'll need to figure out when to show and hide buttons and where to stick the label--this is different for tall vs short use cases. So I make a summary table:
finally! Done with the widget positioning. By using references and various formulas, I can tweak the dimensions, and simplify the walter logic--just need to remember to copy and paste everything :)
The Numbers "tables" used are:
Thats it for now! In my next post I'll add show how to use the theme and where I'll go from here.