Sunday, December 15, 2013

Maximum Midi

In the human or natural world, people or creatures communicate with each other sounds, gestures & motions, symbols & writing, and even smells.

The electronic world, devices communicate with each other through electricity. 

Analog Communication

 In the analog domain, raw voltages carry "meaning", and can sway in relatively massive swings.  Old telephones, for example, convert the voice to electricity, send that electricity over wires, then to a speaker, which renders the electricity as sound.

Digital Communication

In the digital domain, electric current is split into discrete units of measurement: sequences of blips ("on") and bleeps ("off") carry meaning.  A raw voltage might be sampled and converted from a massive, continuous signal, and chunked up into streams of bits.  How a digital device works is highly dependent on the digital design, so what follows is only true at a very high level.

Typically, there are two signals--two wires--a clock wire and a data wire.  Electricity on each wire can be a "high" voltage, and a "low' voltage.  No voltage--well, that could be high, or low, or...just means everything is turned off. Really depends! 
  • In general, the clock signal ticks and tocks, flipping from high voltage to low voltage at regular intervals.  
  • A data signal will be high or low (on or off) in sync with the clock signal
  • A transmitter will "send" on the "tick" portion of a clock (when clock signal falls from high to low) either a high voltage (on) or a low voltage (off).
  • A receiver will "listen" on the tock portion of a clock (when clock signal rises from low to high) for either a high voltage (on) or a low voltage (off).
  • Or...some other design all together (beyond the scope of this posting).

Definition: Bits

On or Off has meaning, so we call this measurement data--the data is one "bit", and is true or false.  A bit forms the basis of binary numbers and all digital processing.

Definition: Serial vs Parallel

Bits can be sent digitally, typically, in one of two methods: in serial, one bit after the other, and in parallel, a whole bunch at a time.   Both have their pros and cons that are far beyond the scope of this blog.  

Definition: Baud Rate

The key is in serial devices, there can only be ONE bit sent--and received--at a time.   Thus, serial devices have what is known as a baud rate--essentially, the clock rate of the digital signal.  A higher baud rate means the clock is running faster, implying that there can be more data sent.  Not always true!

Definition: Protocol

How and when bits are sent, and what a package of bits means--all make up a given protocol.  A protocol is really, how two digital devices "speak" to each other, breaking collection of bits into various packets, and -- in general -- defining strict, repeatable rules that can generate and process the same data the same way over and over again.

Maximum MIDI: One note every 960 microseconds

MIDI (or Musical Instrument Digital Interface) is an asynchronous serial protocol that multiple pieces of musical hardware can use to talk to each other.  The MIDI protocol specifies a maximum baud rate of 31250; a given MIDI packet is 10 bits long: 8 bits of data, and 2 bits of transport overhead.  MIDI also specifies 5 pins (wires), though only 3 are used: pin 1 is ground. Pins 4 and 5 are clock and data.

This means that in a second, MIDI can support a theoretical maximum of 31250 baud rate / 10 bits = 3125 packets of MIDI data. 

A given MIDI note on event is three packets of MIDI data: "note on" "note" "velocity".  That means MIDI can support, at best, 3125/3 = 1041 midi note on events in a given second.

Keep in mind, MIDI is serial, and  this means bits are sent one of after the other.  In MIDI, there is no true simultaneous communication for a given MIDI port.

Since MIDI is serial, when we hit a chord, we aren't sending three note on events a the same time, instead we are sending one note on events three times: one each 1/1041 = 0.00096 seconds (or 960 microseconds).

todo --  above is incorrect, running status

Can the ear hear 960 microseconds of delay? Probably.

In comparison, the human ear should be able to distinguish between .06 microseconds and 1667 microseconds of delay, although technically we're not quite sure.  1667 microseconds represents the the amount of time a single hair could respond, since a given neuron only operates at 600Hz, neurons can't respond any faster then that (sadly inefficient creatures we are).   However, we may have as many as 30k neurons!

The limits of human hearing, courtesy of Yamaha, are as follows:
Yamaha Audio Studies


Will our brain fix 960 microseconds of delay? probably.

Our brain is an incredible processing environment.  It will go through great lengths to keep our natural, analog world in sync with what it thinks should be proper timing.  Whereas neurons may feed information that tell our brain "hey these sounds are getting generate every 960 microseconds", our brain will auto correct those sounds so that they appear to all be starting at the same time.  Delays up to 20 milliseconds are automatically 'corrected' but can be felt...certainly 960 microseconds of delay are not going to be noticed. 

http://edge.org/conversation/brain-time

Can MIDI modules respond within 960 microseconds?

This is a good question. I am not sure yet if synthesizers and romplers have an internal parts per quarter (PPQ) that they use to "batch" chords up...or if they can handle it.


Saturday, September 14, 2013

Encode to MP3 - v2

Well--after thinking about it, all this perl nonsense is a bit much for encoding to MP3!

What benefit do we really get? Not much.

so...

1. Install notifier, leave in download directory:
https://github.com/alloy/terminal-notifier/releases/download/1.5.0/terminal-notifier-1.5.0.zip

2. Install lame: http://www.thalictrum.com/software/lame-3.99.5.pkg.zip

3. Start automator


4. Create a new service titled "Encode to MP3"

5. Setup as follows


6. Save & use!


Sunday, September 1, 2013

Encoding audio to MP3 with LAME, OSX and a right mouse click

I always render WAV / AIFF

Ableton Live 9...for some reason, I thought encoding to mp3 was going to be part of the v9 release.  Sadly Ableton Live 9 still has no way to render mp3 audio directly.

However--turns out, this is not the end of the world for me.  When I use Reaper, I rarely encode to MP3 directly from Reaper either.  Every now and then, the encoder will distort a render, causing an "burble".  UNSATISFACTORY!   So as a matter of habit, I pretty much only render to WAV or AIFF regardless if Live or Reaper.

Still, MP3 is pretty hand format.  How do I get from WAV to MP3 on a Mac?

Audio to MP3 workaround: MAX

I had been using MAX ( http://sbooth.org/Max/ ) and that worked well enough.  However, I am growing weary of the repetitive nature of find rendered file, drop onto max, click convert, etc etc.

Using LAME

I had some time, so I decided to setup a LAME encoder based workflow.  I want the Author, Album, Genre, etc to all be very specific, static things: mainly, me!   So encoders like MAX, or even iTunes--too much repetitive work!   The gold standard mp3 encoder for the home hobbiest is Lame.  Lame doesn't come with OSX by default.

 That means installing Lame.   Hmm..don't want to type in lame commands each time, so that means we'll use PERL to execute the LAME command line.  We'll want to know when the MP3 is created, so we'll use "notifier" to let us know when encoding is done.  And finally, we'll use Apple's Automator, to create a service that will allow us to right click on an audio file (or a bunch of them!) and encode right from the finder. 

Preliminary Steps

1. Setup OSX to run Perl Scripts
Follow along from a prior post:

2. Install "Notifier" in OSX
Follow along from a prior post:

Install LAME

The politics and explanation behind LAME makes my eyes bleed.  We'll jump to the point: for OSX, snag LAME from here:  http://www.thalictrum.com/en/products/lame.html  

Go ahead and install that bad boy using the bog standard OSX installer found on that link (hopefully link still works). When done, in a terminal window, key in "lame" to see if lame installed ok!

Setup PERL Script


1. I created a new Perl script in ~/Documents/Projects/Perl called "encode_to_mp3.pl"

--- BEGIN PERL ... snip below this line ---

#!/usr/bin/perl

use File::Basename;
use Cwd 'abs_path';

######## SETUP ##############

# Get Date
($sec,$min,$hour,$mday,$mon,$year,$wday,$yday,$isdst) = localtime(time);

# MP3 tag setup
$mp3_tag{"ARTIST"}="Crufty";
$mp3_tag{"ALBUM"}="Home";
$mp3_tag{"YEAR"}=$year+1900;
$mp3_tag{"GENRE"}="Homemade";


$notifier='~/Documents/Projects/Perl/terminal-notifier.app/Contents/MacOS/terminal-notifier';

$lame_bin='/usr/local/bin/lame';
$lame_encoding='insane';

######## BEGIN ##############

### COMMAND LINE PARAM HANDLING

# 1. cmd line param check
if ($#ARGV!=0) {
#no input file provided
$script=basename($0);
print "Usage: $script < input file >\n";
exit 1;
}

# 2. input file check
$arg_input_file=$ARGV[0];
if (!-e $arg_input_file) {
#input file not found
print "Error: $arg_input_file not found.\n";
exit 2;
}

### INPUT/OUTPUT FILENAMING

#output mp3 file
$input_file=abs_path($arg_input_file);

($fname, $fpath, $fext) = fileparse($input_file, qr/\.[^.]*/);
$output_file=$fpath.$fname.".mp3";


### ENCODE TO MP3!!
#Encode
system("$notifier -title 'Encode to MP3' -message 'Convert to mp3: $fname'");

#encode input to mp3
system("$lame_bin --preset $lame_encoding --ta '$mp3_tag{ARTIST}' --tl '$mp3_tag{ALBUM}' --ty '$mp3_tag{YEAR}' --tg '$mp3_tag{GENRE}' \'$input_file\' \'$output_file\'");

#Check results
$rv=$?;
if ($rv!=0) {
system("$notifier -title 'Encode to MP3' -message 'Conversion error ( $fname) - $rv'");
exit 3;
}
else {
system("$notifier -title 'Encode to MP3' -message 'Conversion complete: $fname'");
}


exit 0;

--- end PERL ... snip above this line ---


2.  Remember, perl scripts need permission bits!  So from terminal: chmod a+x ~/Documents/Projects/Perl/encode_to_mp3.pl

3. Some customization & tweak notes


In the PERL script, remember to update the below items to read what makes sense for you.  I put everything into one "HOME" album,  using genre "Homemade".  That keeps my stuff well removed from the rest of my music collection:

$mp3_tag{"ARTIST"}="Crufty";
$mp3_tag{"ALBUM"}="Home";
$mp3_tag{"GENRE"}="Homemade";


You will want to change these for your own nefarious needs!

You can easily change the MP3 "quality" by changing the lame preset, from 'insane' to 'medium', 'standard', or 'extreme', etc:
$lame_encoding='insane';

Create Automator Service

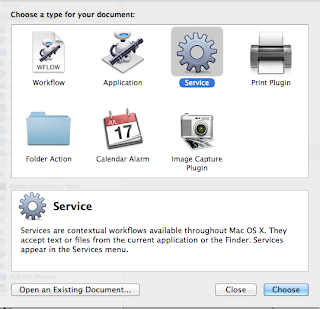
1. First, start automator--the type of document you want to create is "Service"

2. I saved my Automator service as "Encode to mp3"

3. In my "Encode to mp3" service, I added one "Run Shell Script" action as follows:

The script itself is:
for f in "$@"
do
~/Documents/Projects/Perl/encode_to_mp3.pl "$f"
done


Try it out

1. Select a WAV or AIFF in finder, right click, and pick "Encode to mp3"...you should get a notification when encoding begins, and when its complete!


Next Level Stuff

For me, this is all I need.  Still--I could see how it would be handy to have the automator script ask for author, title, genre, album, etc, maybe w/defaults already in mind.  So that could be a good exercise for the reader. 

I could also see how it might be handy for the automator script to automatically add an encoded mp3 to iTunes...however, for me, this would result in a lot of junk mp3s cluttering up my "sacrosanct"  iTunes lib (hur hur), and for now, it is just as easy to double click and "auto import" mp3s that pass--well not the gold, silver or bronze standard...but at least the copper standard :)

Hope this helps someone out there...


Setting up notifier in OSX

When doing OSX automation, it is really handy to send yourself notification messages.   Sadly, for reasons not clear, notification isn't part of apple script, nor the OSX command line.

Fortunately, there is a free tool that appears to work really well!

https://github.com/alloy/terminal-notifier


  1. Download notifier from the link above -- it will automatically unzip in your Downloads folder
  2. Move the "terminal-notifier" program from the ~\Downloads\terminal_notifier-x.y.z folder to ~\Documents\Perl
Now, to send a notification: 
~/Documents/Projects/Perl/terminal-notifier.app/Contents/MacOS/terminal-notifier -title 'My Title' -message 'My message'

Tada!


Wednesday, July 10, 2013

Perl Script - Convert Reaper ReaBANK to M4L

Reaper uses patch files (xyz.ReaBank).  Max 4 Live has drop down menus (aka enums) that can act as erstwhile patch selection menus.  Sadly, Max4Live menu population requires space delimited quoted names, and ReaBanks look like:


// Roland MKS-50 programs.  Transcribed by ZoeB.

Bank 0 0 MKS-50 Bank

0 Poly synth 1
1 Jazz guitar
2 Xylophone
3 Low strings
4 Lead synth 1
5 Chorus guitar
6 Synth bass 1
7 Electro drum
8 High strings
9 Techno strings
...

Man! Well, in the prior posting, we setup our OSX environment to run perl scripts setup in a special folder.  So what I did was create a real simple, brief perl script that will convert a given .ReaBANK file into a format suitable for copying and pasting into Max4Live.  We'll give it a filename via a command line parameter, and create a ".m4l.txt" version that is ready to copy and paste into a max4live drop down menu aka enum.  Naturally, the original .ReaBank file is left alone.

So, as usuall--fire up TextEdit, make a new file, ensure it is plain text.  I saved this to Documents\Projects\Perl, and called it reaBank_to_m4l_enum.pl

1. Create reaBank_to_m4l_enum.pl

#!/usr/bin/perl

$file=$ARGV[0];
$incl_ctr_in_patch_name=1;

if (-e $file) {
$ctr=0;
$out_file=$file.".m4l.txt";
open(IN,$file);
open(OUT,">".$out_file);
$patch_num="";
while() {
chomp;
if (/^\s*(\d+)\s+(.*)$/) {
$patch_name=$2;
$patch_name=~s/\s$//;

if ($incl_ctr_in_patch_name) {
     $patch_num=sprintf("%03d",$ctr)." - ";
}

print OUT '"'.$patch_num.$patch_name.'" ';
$ctr++;
}
}
close IN;
print OUT "\n";
close OUT;
print `cat "$out_file"`;
}
else {
print "Couldn't find $file\n";
exit 1;
}

2.  Start Terminal and set perl script as executable

After launching terminal I type the following commands:
$ cd Documents/Projects/Perl
$ chmod a+x reaBank_to_m4l_enum.pl

now, we can run this program from anywhere in a Terminal session, and convert ReaBank files to something else.  This is not the most user friendly way....but...we'll get to that in a later post via Automator (maybe).

3.  Example use

$ cd wherever/we/keep/our/ReaBank/files
$ reaBank_to_m4l_enum.pl  

For example, suppose we downloaded Roland_MKS-50.ReaBank from the Reaper Stash (a repository of stuff for Reaper:
// Roland MKS-50 programs.  Transcribed by ZoeB.

Bank 0 0 MKS-50 Bank

0 Poly synth 1
1 Jazz guitar
2 Xylophone
3 Low strings
4 Lead synth 1
5 Chorus guitar
6 Synth bass 1
7 Electro drum
8 High strings
9 Techno strings
10 String organ
11 Fast strings
12 Long strings
13 Cello
14 Solo violin
15 Pizzicato
16 Piano 1
17 Electric piano 1
18 Electric piano 2
19 Piano 2
20 Electric piano 3
21 Clav.
22 Harpsichord
23 Piano pad
24 Organ 1
25 Organ 2
26 Cheesy organ
27 Pipe organ 1
28 Pipe organ 2
29 Voice pad
30 Sinusoidal
31 Voices 1
32 Brass 1
33 Syn rise
34 Spit valve
35 Fat synth
36 Arpeggiator
37 Velo-reso 1
38 Big brass
39 Pad 1
40 Lead synth 2
41 Lead synth 3
42 Flute
43 Lead synth 4
44 Sax 
45 Electric bass 1
46 Synth bass 2
47 Sequencer bass
48 Bells 1
49 Bell chime 1
50 Bell chime 2
51 Syn-bello
52 Marimba
53 Synth koto
54 Steel drum band
55 Harp
56 Tron blast
57 Noise shots
58 Twilight Zone
59 Scratchin'
60 Syn echo
61 Pole position
62 UFO
63 Timps
64 Brass 2
65 Brass 3
66 Brass horns
67 Fat brass 1
68 Trumpets
69 Brass swell
70 Poly synth 2
71 Poly synth 3
72 Bowed strings
73 Rich strings
74 Orchestra
75 Syn orchestra
76 String sweep
77 Solo violin 2
78 Double basses
79 Ominous
80 Piano 3
81 Electric piano 4
82 Loud piano
83 Piano FX
84 Clavichord
85 Harpsichord 2
86 Acoustic guitar
87 Bass piano
88 Organ 3
89 Organ 4
90 Chowa organ
91 Pipe organ 3
92 Accordion
93 Vocoder
94 Voices 2
95 Harmonica
96 Synth sweep
97 Poly pulse
98 Cosmo sweep
99 Chorus pluck
100 Bells 2
101 Vibe
102 Koto
103 Bell chime 3
104 Lead synth 5
105 Lead synth 6
106 Inv-solo
107 Clarinet
108 Oboe
109 Synth bass 3
110 Synth bass 4
111 Upright bass
112 Machines
113 Echo explosion
114 Ooops
115 Jet chord
116 Take-off
117 Whistle
118 Surprise
119 Oct jump
120 Jet
121 Helicopter
122 Dogs bark
123 WET
124 Oooh SCARY
125 What the..?
126 Synth toms
127 Kick

Now, we cd /to/the/dir that has this file, and run our perl script:
$ reaBank_to_m4l_enum.pl Roland_MKS-50.ReaBank
"000 - Poly synth 1" "001 - Jazz guitar" "002 - Xylophone" "003 - Low strings" "004 - Lead synth 1" "005 - Chorus guitar" "006 - Synth bass 1" "007 - Electro drum" "008 - High strings" "009 - Techno strings" "010 - String organ" "011 - Fast strings" "012 - Long strings" "013 - Cello" "014 - Solo violin" "015 - Pizzicato" "016 - Piano 1" "017 - Electric piano 1" "018 - Electric piano 2" "019 - Piano 2" "020 - Electric piano 3" "021 - Clav." "022 - Harpsichord" "023 - Piano pad" "024 - Organ 1" "025 - Organ 2" "026 - Cheesy organ" "027 - Pipe organ 1" "028 - Pipe organ 2" "029 - Voice pad" "030 - Sinusoidal" "031 - Voices 1" "032 - Brass 1" "033 - Syn rise" "034 - Spit valve" "035 - Fat synth" "036 - Arpeggiator" "037 - Velo-reso 1" "038 - Big brass" "039 - Pad 1" "040 - Lead synth 2" "041 - Lead synth 3" "042 - Flute" "043 - Lead synth 4" "044 - Sax" "045 - Electric bass 1" "046 - Synth bass 2" "047 - Sequencer bass" "048 - Bells 1" "049 - Bell chime 1" "050 - Bell chime 2" "051 - Syn-bello" "052 - Marimba" "053 - Synth koto" "054 - Steel drum band" "055 - Harp" "056 - Tron blast" "057 - Noise shots" "058 - Twilight Zone" "059 - Scratchin'" "060 - Syn echo" "061 - Pole position" "062 - UFO" "063 - Timps" "064 - Brass 2" "065 - Brass 3" "066 - Brass horns" "067 - Fat brass 1" "068 - Trumpets" "069 - Brass swell" "070 - Poly synth 2" "071 - Poly synth 3" "072 - Bowed strings" "073 - Rich strings" "074 - Orchestra" "075 - Syn orchestra" "076 - String sweep" "077 - Solo violin 2" "078 - Double basses" "079 - Ominous" "080 - Piano 3" "081 - Electric piano 4" "082 - Loud piano" "083 - Piano FX" "084 - Clavichord" "085 - Harpsichord 2" "086 - Acoustic guitar" "087 - Bass piano" "088 - Organ 3" "089 - Organ 4" "090 - Chowa organ" "091 - Pipe organ 3" "092 - Accordion" "093 - Vocoder" "094 - Voices 2" "095 - Harmonica" "096 - Synth sweep" "097 - Poly pulse" "098 - Cosmo sweep" "099 - Chorus pluck" "100 - Bells 2" "101 - Vibe" "102 - Koto" "103 - Bell chime 3" "104 - Lead synth 5" "105 - Lead synth 6" "106 - Inv-solo" "107 - Clarinet" "108 - Oboe" "109 - Synth bass 3" "110 - Synth bass 4" "111 - Upright bass" "112 - Machines" "113 - Echo explosion" "114 - Ooops" "115 - Jet chord" "116 - Take-off" "117 - Whistle" "118 - Surprise" "119 - Oct jump" "120 - Jet" "121 - Helicopter" "122 - Dogs bark" "123 - WET" "124 - Oooh SCARY" "125 - What the..?" "126 - Synth toms" "127 - Kick" 

Now we can select that long line of output and simply paste into a max 4 live enum!  In addition, a file Roland_MKS-50.ReaBank.m4l.txt, was created; this file contains identical output to above, so if for some reason we forget to copy and paste right away, we can easily get back to the converted ReaBank output.  The original .ReaBank file is, of course, untouched.  Now, I can go and leech all the .ReaBank files I need for any custom max 4 live patch selection midi devices!

Note

This perl script, like all perl scripts, is flaky and not 100% fool proof.  It might not do the right thing every time--for example, comments could really jack up the output. Yes we could accommodate them, some kind of s/\/\/.*//g search and replace, but honestly--it can be just as easy to delete the offending lines out of a problematic .ReaBank!  The goal is not to perfectly convert every file to something Max4Live can use, just to make it easier to convert.


Monday, June 24, 2013

Perl Scripts in OSX

Perl Scripts in OSX

Scripting is an "easy" way to get things done.   OSX has Automator, which is a great tool.  However, sometimes it's just easier to do certain text processing in other scripting languages.  The three "greats" are Perl, Python and Ruby.

When it comes to lazy, homegrown text manipulation, I like using tiny bits of Perl.  Well, for Terminal stuff.

All of what follows is intended, eventually, to run from the Terminal or an automator.


Organization: Create a Perl folder

The key to automation is organization.   Keep things separate, keep things simple, and our job of remembering stuff gets a lot easier!

In finder, I created a Projects folder under Documents.  In Projects, I created a Perl folder. 


Add new Perl Folder to your .profile

Now that we have created a folder to hold all our perl scripts, we want to make our lives easier and do some stuff that will allow us to run any file -- in this perl folder -- from any location in a Terminal session. 


First, run TextEdit (or your favorite text editor)...


First, check to see if you have a .profile already--you probably do not.  But just in case, File -> Open, navigate to your "Home", then press  Command + Shift + . to see all .dot files.   IF you see a .profile, then you will want to edit that file...very carefully I might add!

I was surprised to find I did not have a .profile.  So I cancelled out of the File Open dialog and created a new document. 

First things first--when editing "UNIX" style files, remember to change the "RTF" style document to a plain text document! Format -> Make Plain Text
  
Next, we are going to append to a system variable called "PATH".   PATH is used to tell Terminal sessions where commands exist.  Any folder in the PATH will be searched when running commands from a Terminal session.  So by adding our new Perl folder to the path, we'll be able to run our perl scripts from anywhere on our mac.

If you already have a .profile--be careful!  modifying an existing .profile is beyond the scope of this blog post.  Hopefully if you have a .profile, you know what you are doing!

I did not have a .profile, so I simply typed in:

export PATH="$PATH:~/Documents/Projects/Perl"

Notice the double quotes!  Very important.


Finally, lets save.  When saving, we will want the filename to be ".profile", the directory to be our home, and we will want to save w/out a .txt extension!  When prompted, confirm that yes we want tp use ".".  


When running terminal, in commands keyed into this /.profile file will be automatically executed.  There is all kinds of neat stuff one can do! However, I like to keep things simple and vanilla.  I'm sure there is an OSX way to "get-et-done", but whatever...

Create our first Perl script

now, once again, lets create a new document in Text Edit.  As usual--Make Plain Text.  Save, and when saving, uncheck "if no extension is provided, us .txt" checkbox.  I called this script "hello.pl"...and remember, I need to save it in 

The first line tells our Terminal session what kind of script we're running--so for Perl, the script needs to start with: #!/usr/bin/perl

after that...all our perl commands!  In this case, something simple...

print "Hello world!\n";

exit 0;


Setting up our script

Finally! Done w/TextEdit.  First, launch terminal.

Once in terminal, lets change directories to our Perl folder!

$ cd Documents/
$ cd Projects/
$ cd Perl/

Once there...lets add execute permissions to our perl script!

$ chmod a+x hello.pl


Running our script

From any directory in Terminal, key in hello.pl, and our program will run!

$ hello.pl


Recap: Creating Perl Scripts


  1. Create a "Plain Text" file -- usually ending in .pl 
  2. First line of file reads #!/usr/bin/perl
  3. Make file executable via chmod a+x
Phew!  Seems like a lot right?  Well...not really.  Lets find out why in a future post, as use a perl script to convert Reaper ReaBank's to something we can paste into a Max4Live objects.


Saturday, June 22, 2013

Ableton Live - Roland MDC-1 Synth Controller

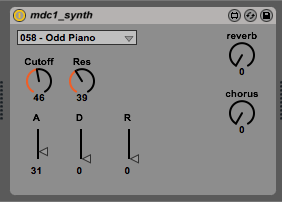
Max 4 Live - MDC1 Synth Controller


Sending NNRPN messages via M4L  -- not sure this is the canonical way.

Relevant bits of the Roland MDC-1 manual:


Thursday, June 20, 2013

Reaper - Crufty Midi theme


If you have been following along, drop the below in your current theme "rtconfig.txt" ... or download here crufty_midi.ReaperThemeZip

This probably will be it for me and  Reaper v4 / midi for a while...


;-- Crufty Begin ----------------
Layout "crufty_midi"
;Remove un-needed items
clear tcp.pan
clear tcp.pan.*a
clear tcp.io
clear tcp.io.*
clear tcp.recmon
clear tcp.recmode
clear tcp.phase
clear tcp.recinput
clear tcp.recinput.*
clear tcp.recarm
clear tcp.io
clear tcp.meter
clear tcp.meter.*
clear tcp.volume
clear tcp.volume.*
clear tcp.width
clear tcp.width.*
clear tcp.fxin
clear tcp.fxin.*
; 2x2 configuration "tall"
; grid_00 grid_01
; grid_10 grid_11

set grid_00 [ 20  0 16 16 0 0 0 0 ]
set grid_01 [ 36  0 16 16 0 0 0 0 ]
set grid_10 [ 20 16 16 16 0 0 0 0 ]
set grid_11 [ 36 16 16 16 0 0 0 0 ]

  ; 1x4 configuration "short"
; col1 col2 col3 col4
set col1 [ 20 4 16 16 0 0 0 0 ]
  set col2 [ 36 4 16 16 0 0 0 0 ]
set col3 [ 52 4 16 16 0 0 0 0 ]
set col4 [ 68 4 16 16 0 0 0 0 ]
set tcp.size h<32 [340 24] [340 32]
set tcp.margin [ 0 0 0 0 ]


;trackidx 
set tcp.trackidx w<50 [0] [ 0 2 20 20 0 0 0 0 ]

;mute & solo
;              |--short-------|  |--tall-----|
set tcp.mute h<32 w<132 [0] col1 w<116 [0] grid_00

;              |--short-------|  |--tall-------------------|
set tcp.solo h<32 w<132 [0] col2 w<116 [0] w<132 grid_10 grid_01

;vst & envelopes
set tcp.fx  h<32 w<148 [0] col3 w<132 [0] grid_10
set tcp.env h<32 w<148 [0] col4 w<132 [0] grid_11

; track label
set tcp.label h<32 w<132 w<51 w<25 [ 0 0 24 24 0 0 0] [ 0 0 340 24 0 0 1 0 ] [ 20 0 144 24  0 0 1 0  ] w<148 [ 52 0 112 24 0 0 1 0 ]  [ 84 0 80 24  0 0 1 0 ] w<116 [ 20 0 144 32  0 0 1 0  ] w<132 [ 36 0 128 32  0 0 1 0  ] [52 0 112 32  0 0 1 0 ] 

; what tcp.label is doing:
; h <32
; w<25:  label only (vert):  [ 0 0 24 24 0 0 0]
; w>25, w<51: label only (horiz): [ 0 0 340 24 0 0 1 0 ]
; w>51, w<132: 2 buttons only: [ 20 0 144 24  0 0 1 0  ]
; w>132, w<148: 4 buttons only: [ 52 0 112 24 0 0 1 0 ]
; w>148: 4 buttons + params: [ 84 0 80 24  0 0 1 0 ]
; h>32
; w<116 i forgot!!!
; w<132 yup doing something here
; w>=132 not sure anymore

;                               |-- add fxparm.w to label.w ----|  
set tcp.label tcp_fxparms==0 + [ 0 0 160 0 0 0 0] tcp.label w<324 + [ 0 0 160 0 0 0 0]  tcp.label     
set tcp.label.margin [ 2 2 0 0 0 0.5 ]
set tcp.label.font [ 0 ]
set tcp.label.color [ 102 255 255 0   0 255 255 0 ]
; fx paras
set tcp.fxparm tcp_fxparms==0 [0] w<324 [0] [ 164 0 160 32 1 0 1 1 ]
set tcp.fxparm.font [1]
set tcp.fxparm.margin [ 0 0 0 0 0]
; hide folders when super narrow
set tcp.foldercomp w<50 [0] [ 324 0 16 16 1 1 1 1]
set tcp.folder w<50 [0] [ 324 10 16 16 1 1 1 1]

Layout "crufty_midi_vst"
set tcp.fxin tcp.fx
clear tcp.fx
EndLayout 
EndLayout
;-- Crufty End ------------------